De-Brassifying Doors
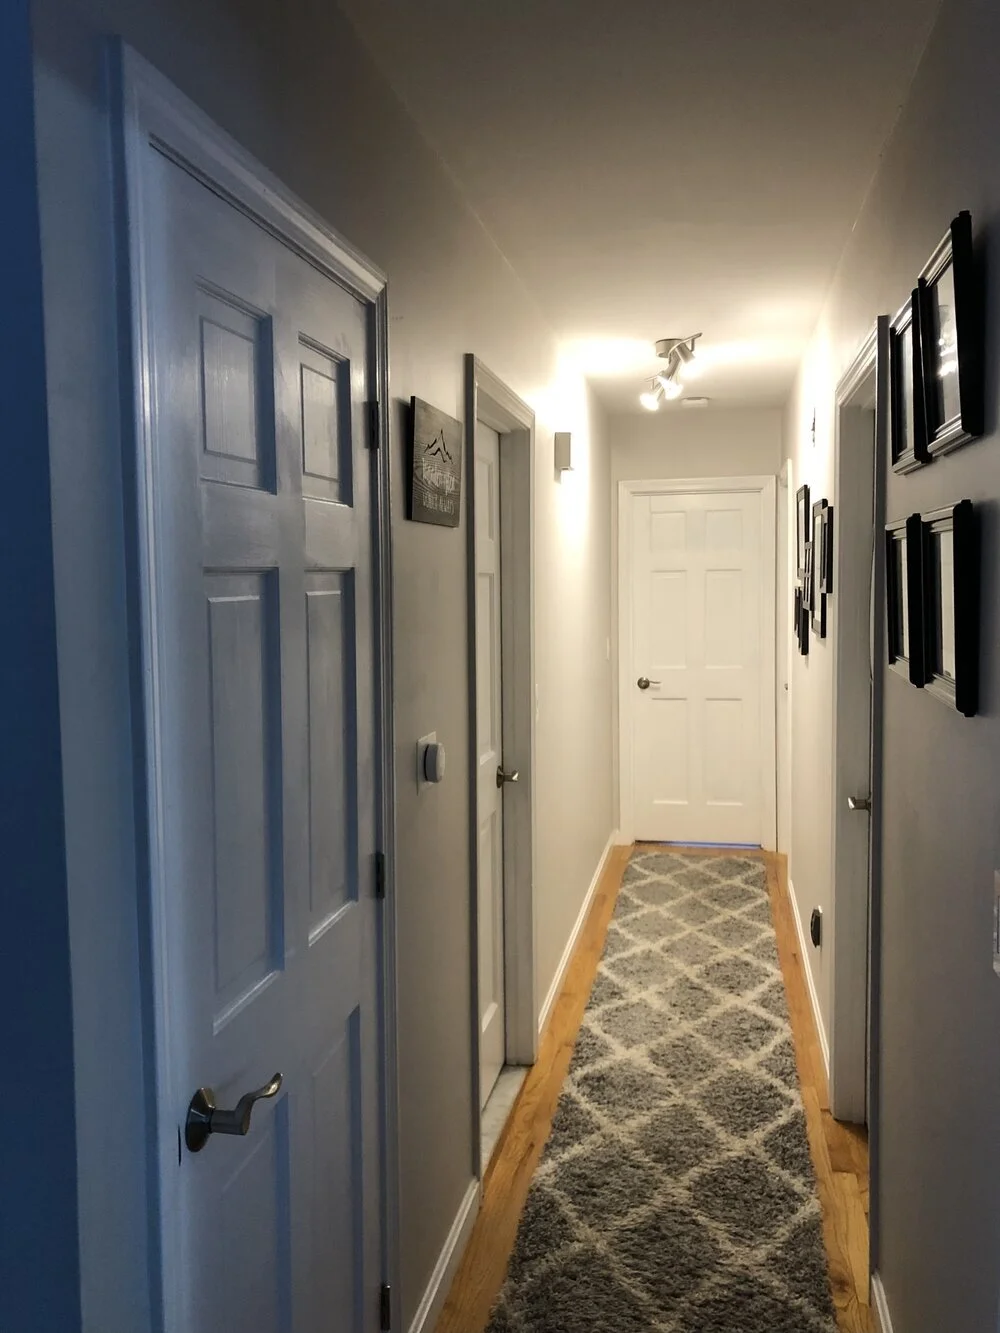
I live in a long narrow ranch, which means I’ve got a hallway full of doors that reminds me of The Matrix.
Okay, well… maybe not exactly.

There are nine swinging interior doors on the main floor of my house: three bedrooms, two bathrooms, three closets, and one staircase. The doors were trimmed with a mix of handles and knobs… mostly shiny yellow brass, but some chrome mixed in just for good measure. I had given the once-ivory doors a first coat of white paint, but it was a half-complete job.


The hall is a pale grey with white doors and trim, so I decided brushed nickel would look best. It also matches the bathroom fixtures.
The downstairs has two doors, both a medium blonde wood tone. I decided it was less important to have doors on different floors match each other, so these doors will get the same shape handle, but in aged bronze.


With a mix of rooms and doors, I needed to pay attention to the “passage” versus “privacy” handle types, but Schlage “Sacramento” handles are designed to be flipped so that I didn’t need to worry about left- or right-hand openings. I’ll save this handy graphic for next time I need it… hopefully never.


Hallway with brushed nickel handles and hinges.

Downstairs doors: before (left) and after (right)
This left me with the conundrum over what to do with the exterior doors. Both sets of French doors (one wood tone, one white paint) have shiny yellow-brass handles. The locking mechanism is more complicated than a normal door, and I couldn’t find a replacement until I went to the Anderson website. Boy, I was in for a shock. Weighing in at nearly $900 per door, I became highly motivated to find a way to re-color the existing hardware. There are many opinions (and failed spray-paint attempts) out on the interwebs, so I’ll do some experimenting with the box of discarded handles. I’ve read good things about self-etching primer, as well as autobody services. I’ll keep ya posted.


Bedroom Refresh: Paint
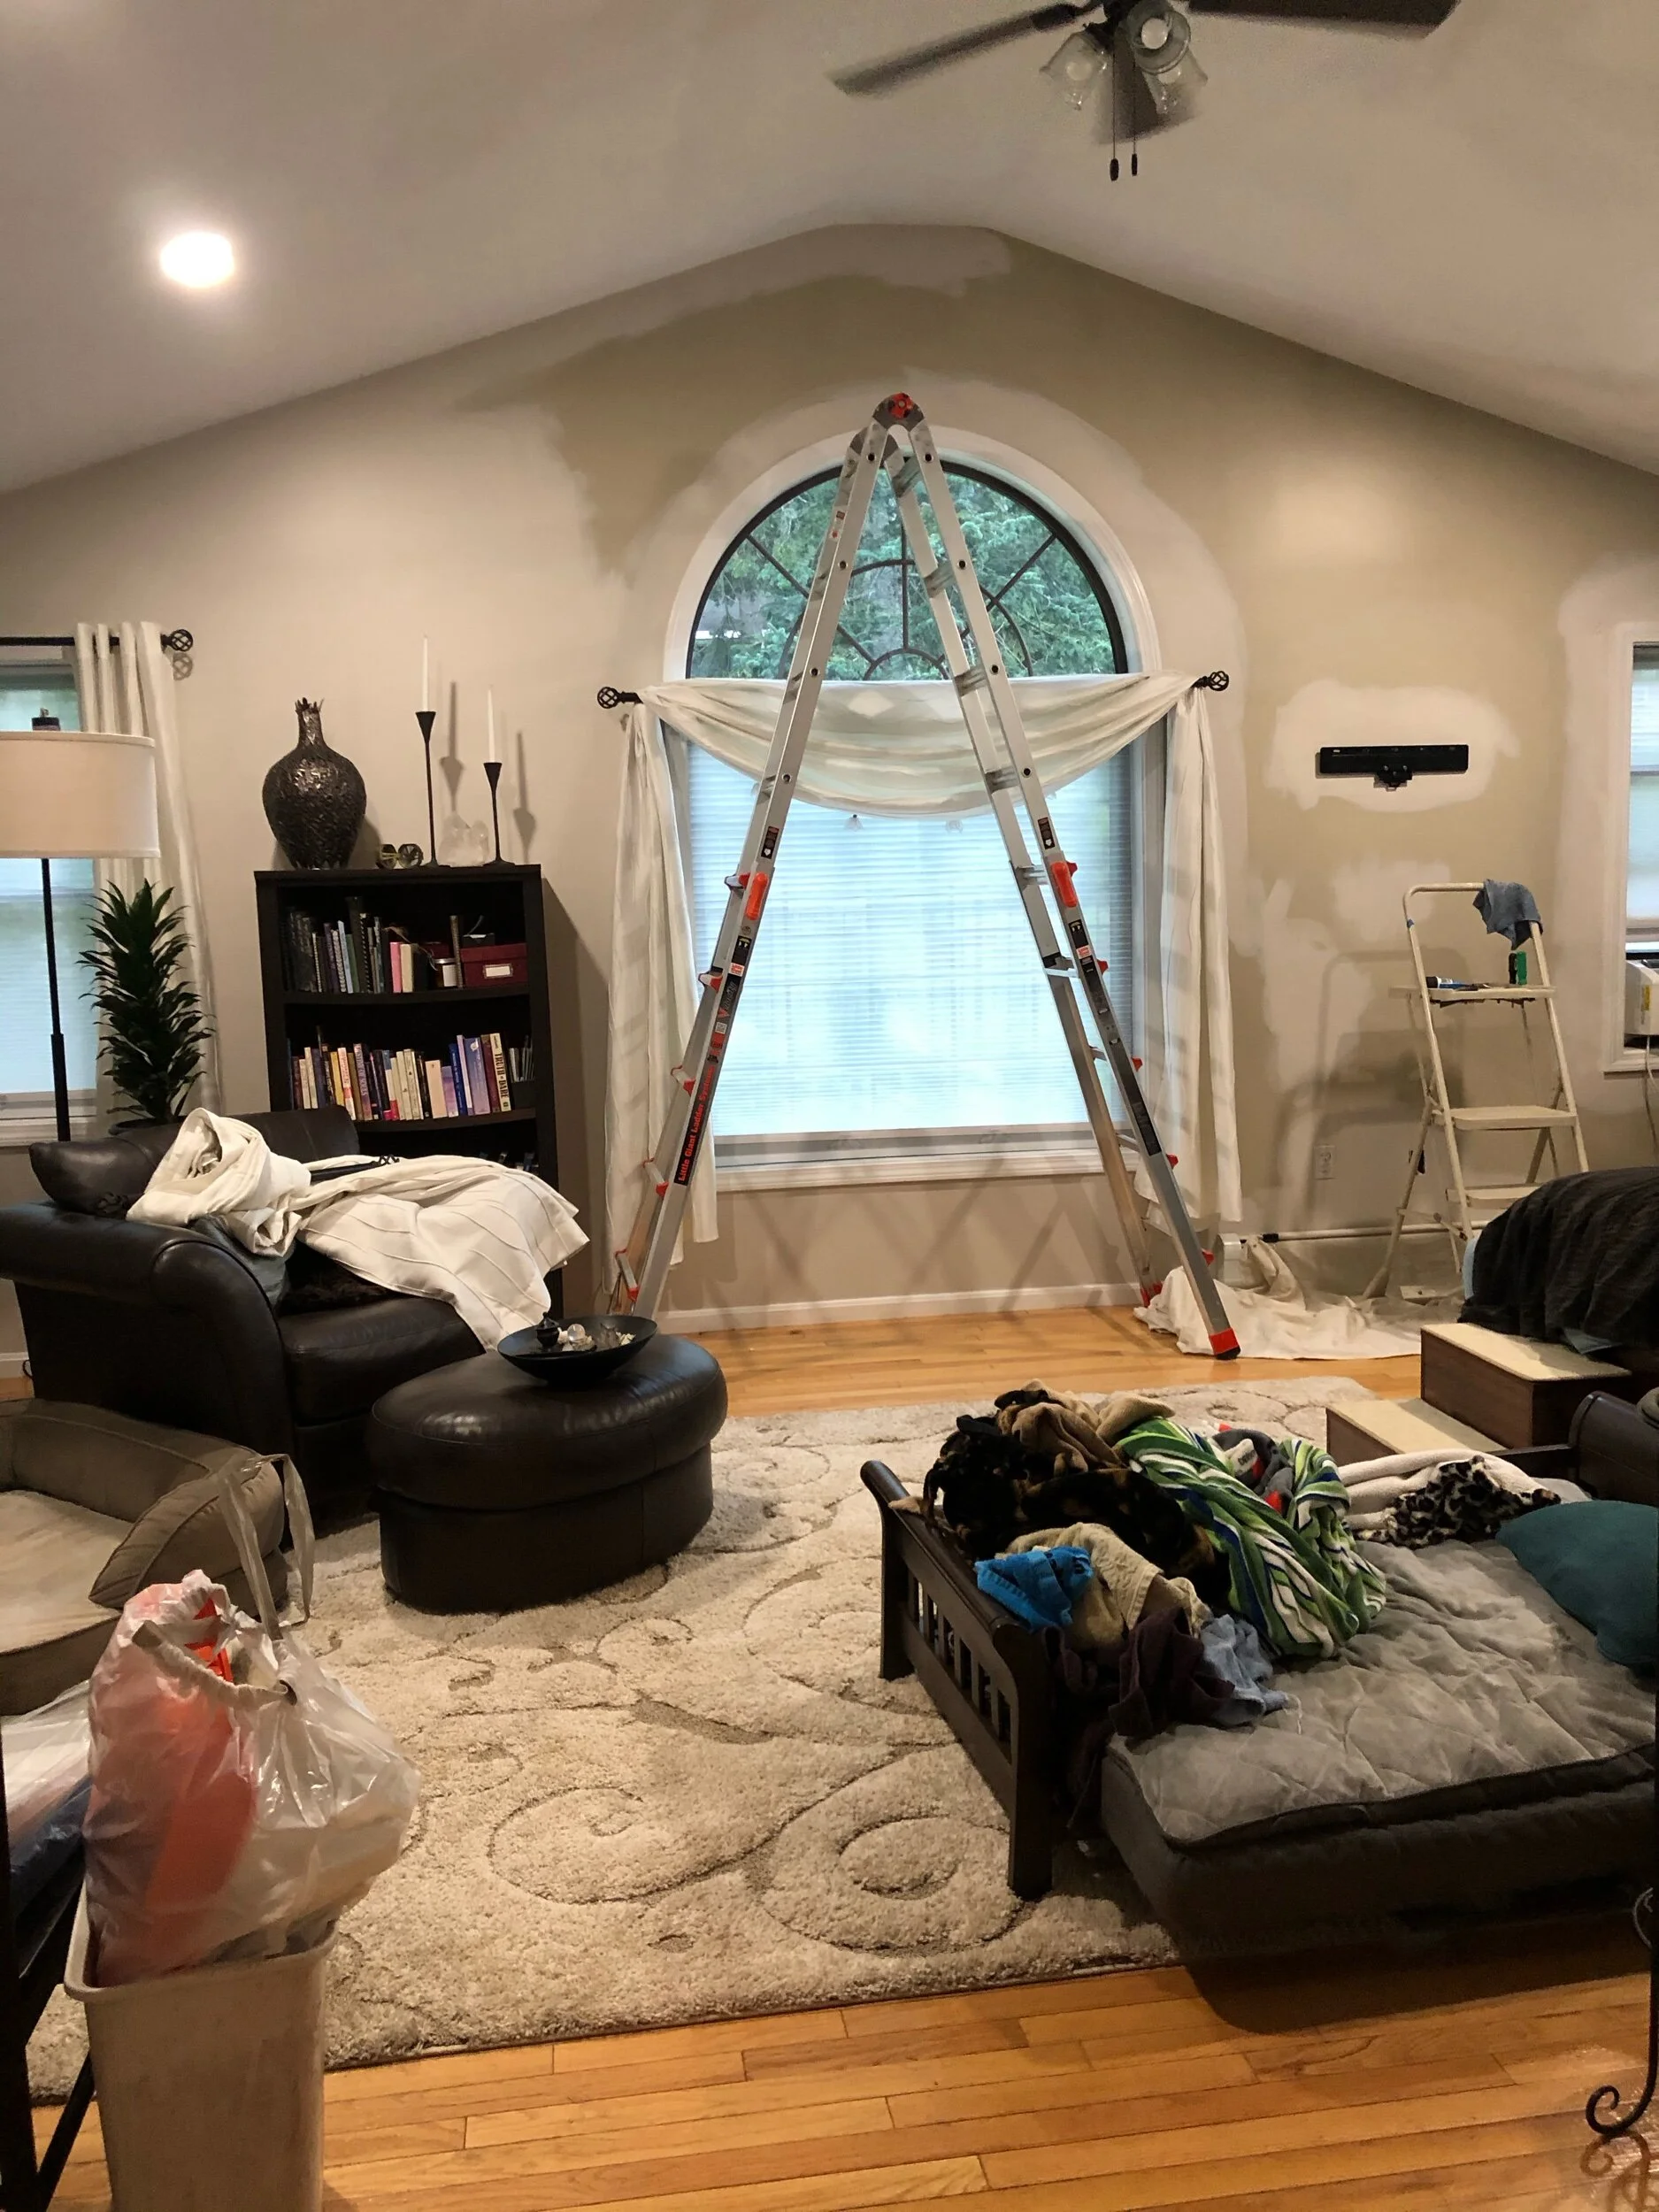
Staying home during a pandemic gives you a lot of time to notice things. Like how many mosquito smears you can’t clean off your ceiling. I cranked the AC and stayed inside on the 100-degree days to freshen up my bedroom.
I liked the paint color when I chose it seven years ago, but years of grime on the walls (“ghosting”, and not the social media kind) had lent it a dark and dingy quality. You can see the stripes where the cold air leaking in at the rafters and gaps in insulation created the right conditions for particulates to stick. And then of course the smeared areas where I tried unsuccessfully to wash it.
So! Walls, ceiling, trim. All of it fresh and clean.


Stairwell
Finally… the last of the wallpaper is gone. PHEW. I know that there are some modern, trendy, easy-to-remove-later wallpapers out there… but this wasn’t that. This was the kind of wallpaper that holds musty odors from 30 years ago.
To be fair, this wall paper wasn’t as terrible as all that. But it was torn in places, and very dirty. And there was an area of concealed mold on the drywall adjacent to the french doors, so I’m glad I took it down.
Okay, this ‘before’ picture is terrible, but it’s the best I could dredge up from before the wallpaper was removed. You can see how the wallpaper ends at the french doors, and the wall on the right reflects the wainscoting and paint used around the rest of the room.


Ripping the wallpaper down also tore off the skin of the drywall in areas… so, this became a skim-coating and sanding and drywall dust nightmare.


The existing paint suits the room perfectly… I think a color color would detract from the richness of the woodwork, brick, and tile. Behr’s Linen White matches the existing walls perfectly… although I do plan to freshen up the room with a new coat.
Not perfect… but good enough for now.


The old brass-and-glass wall lamp is now replaced with a simple tiffany-style sconce that matches the new ceiling light and desk lamp in the office.


Painted Eaves
What a difference a paint job can make.
When I bought the house, the reddish-brown roof tied in nicely with the rust-red colored eaves... the painted soffit and fascia with a brown aluminum gutter. The problem was... I didn't much like the roof color, and it was in bad shape. When I replaced the roof, I chose green. And it contrasted hideously with the red paint.

Glidden Premium Exterior Paint: Deep Forest Pine, Flat Finish
The professional painter community started out skeptical of Glidden... but since it's been reformulated into the 'Premium' line, it offers a good thick paint with excellent coverage and color density... at about $20/gal instead of the competitor's $75/gal. Now, I'm totally willing to pay more for high quality, but if I can get very good quality cheaper, I like that, too.
I'm exceptionally pleased with the end result. No more peeling, flakey brick-red-fading-to-odd-mauve. It's a thick, velvet smooth coat of lush green. Flat, but washable. Bingo.


Craft Room
I scraped the popcorn ceiling about a year ago, and have been looking at the splotchy gray and white ever since. So... why not make it an annual thing? I spent my Christmas stay-cation determined to finish what I had started.

Behr Oslo Blue
(PPU13-13)


Guest Bathroom
A quickie makeover with fresh paint and peel-and-stick tile flooring.
I decided to give the guest bathroom a quickie makeover.

I was never really a fan of the speckled blue tile, so I jumped at the bargain bin floor tiles when I found them at Home Depot. I laid out all the full-size tiles, and managed to make a few straight cuts with scissors. I'm ready to upgrade to an exacto knife. My biggest challenge so far has been determining what line to use to define "straight". Nothing is perfectly square, so i figured I'd start with the angle you see first when you walk in.
I also picked a few paint samples. I went with the medium gray, since the dark gray looked too dark when backlit by the window.


Kitchen Colors
Painted counter and peel-and-stick backsplash gives short-term brightness to my previously dull kitchen.
Before
The tan/bisque/yellow color palate was dreary and screaming out for an update. I want to fix the door-adjacent-stove problem before I invest in gorgeous stone countertops, new sink, and real tile. So, this gives me a pick-me-up for now. It's a $300 fix to a $5000 problem.
One of the countertop seams had started to lift... and it was getting worse. So I started to poke at it, and I made it a lot worse. I figured, I hate the crappy beige plastic counters... what do I have to lose? I started by peeling back the plastic and chiseling out the rotted wet sawdust.
Now what? Ah, good old-fashioned Bondo. The first layer goes in thin, to keep the crumbs down like when you're frosting a cake. I continued with a thicker, smooth layer. And then sanding. I have to admit, I got lazy here, and if you know where to run your hand across the finished counter, you can still feel the lump. (And if you call me out on it, no treats for you.)

Now the fun part... paint!
Product: Giani Granite White Diamond
They call it a three-step process, but it's actually more like five:
Step 1: Roll on flat black primer
Step 2a: Sponge on 'Pearl Mica'
Step 2b: Sponge on 'Inca Gold'
Step 2c: Sponge on 'Limestone White' (twice)
Step 3: Roll on glossy top coat
Next: peel-and-stick backsplash. Product: Tic Tac Tiles, in Subway White.


After
After adding under-cabinet lighting and caulk, the kitchen feels brighter and cleaner.
Products:
LED Concepts Linkable LED Light Bars attach to the under-side of the cabinet.
Two Lutron remote-controlled dimmer plugs allow me to control lights on both sides of the kitchen (plugged into two different outlets) using a single switch.
Lutron double-gang wall plate fastened directly to the drywall holds two remotes - one for the under cabinet lights, and one for the over-the-sink light.


Painted Wall
Ugly retaining wall turned gorgeous mural.
My mother, the very talented Mrs. Pineo of the mural-painted Hadley Elementary School, offered to paint my ugly retaining wall. She painted it without my help... in fact, she was dog sitting while I was sunning myself at Virginia Beach.
So now my formerly ugly eyesore of a retaining wall is a lovely mural that blends in with the landscaping... and soon... patio!
Before

After


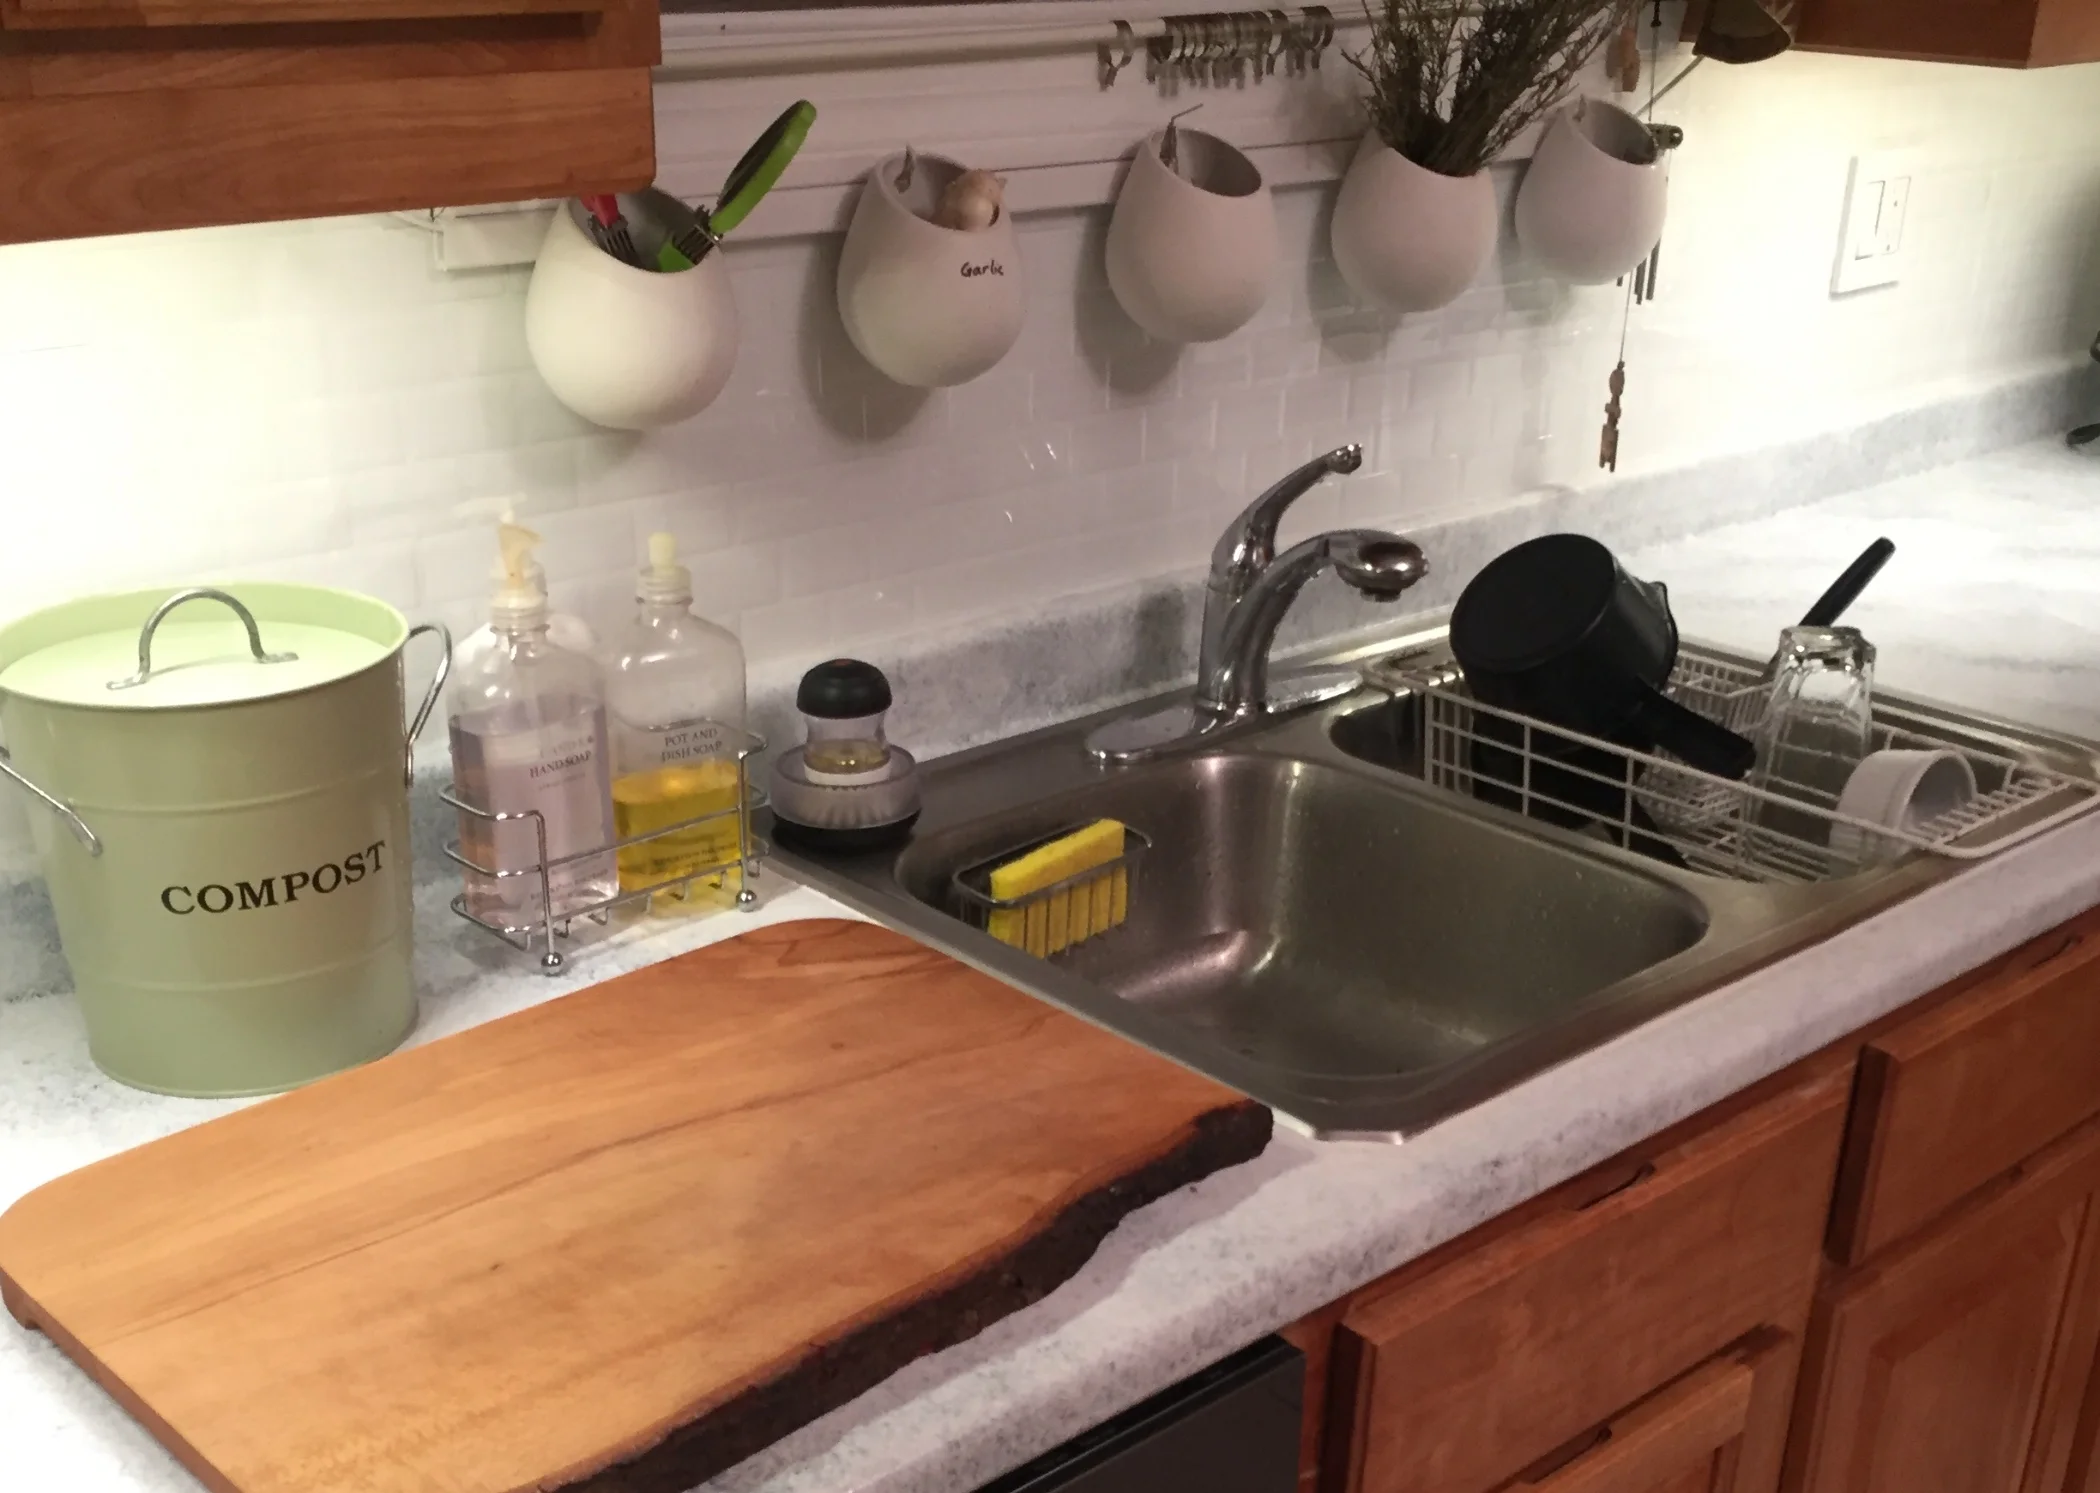
Dining Room Paint
Picking the right green was easier said than done, but now that the dining room is painted, I'm happy with it.

Turns out, choosing the right green is a real pain in the ass. Behr's Wheat Grass looked great in my neighbor's breezeway, but ended up looking like pea soup in my dining room. Then there's too-minty, too-olivey, and too-grayish.
I ended up choosing Glidden's Sandarac Sage... I based it on the color of my cute little countertop compost bin.


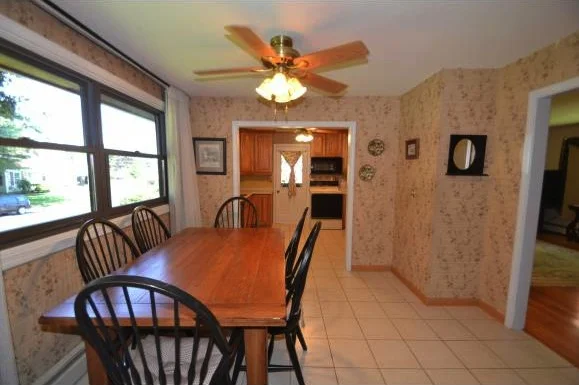
Wallpaper Begone
Painful, and worth it.
Before
These photos are from the real estate listing when I bought the house.

In-the-Middle
So, these aren't really 'After' photos, but at least they show the wall paper gone. Look at that awesome 70s mustard color!


Dining Room Blinds and Ceiling Repair
Damage behind the blinds needed to be repaired before painting.
I took down the vertical blinds in preparation for getting rid of the wallpaper. This is when I realized that the ceiling had been popcorn-coated. And apparently when they scraped it off, they didn't bother to remove the blinds so they could scrape all the way to the edges. What a pain in the ass, since now I have to paint the entire ceiling over again. #JobDoneWrong


Deck Paint
Painting the Trex to eliminate the faded striped look.
Before
Faded, striped, and pinkish... not the look I'm going for. Time for an update.
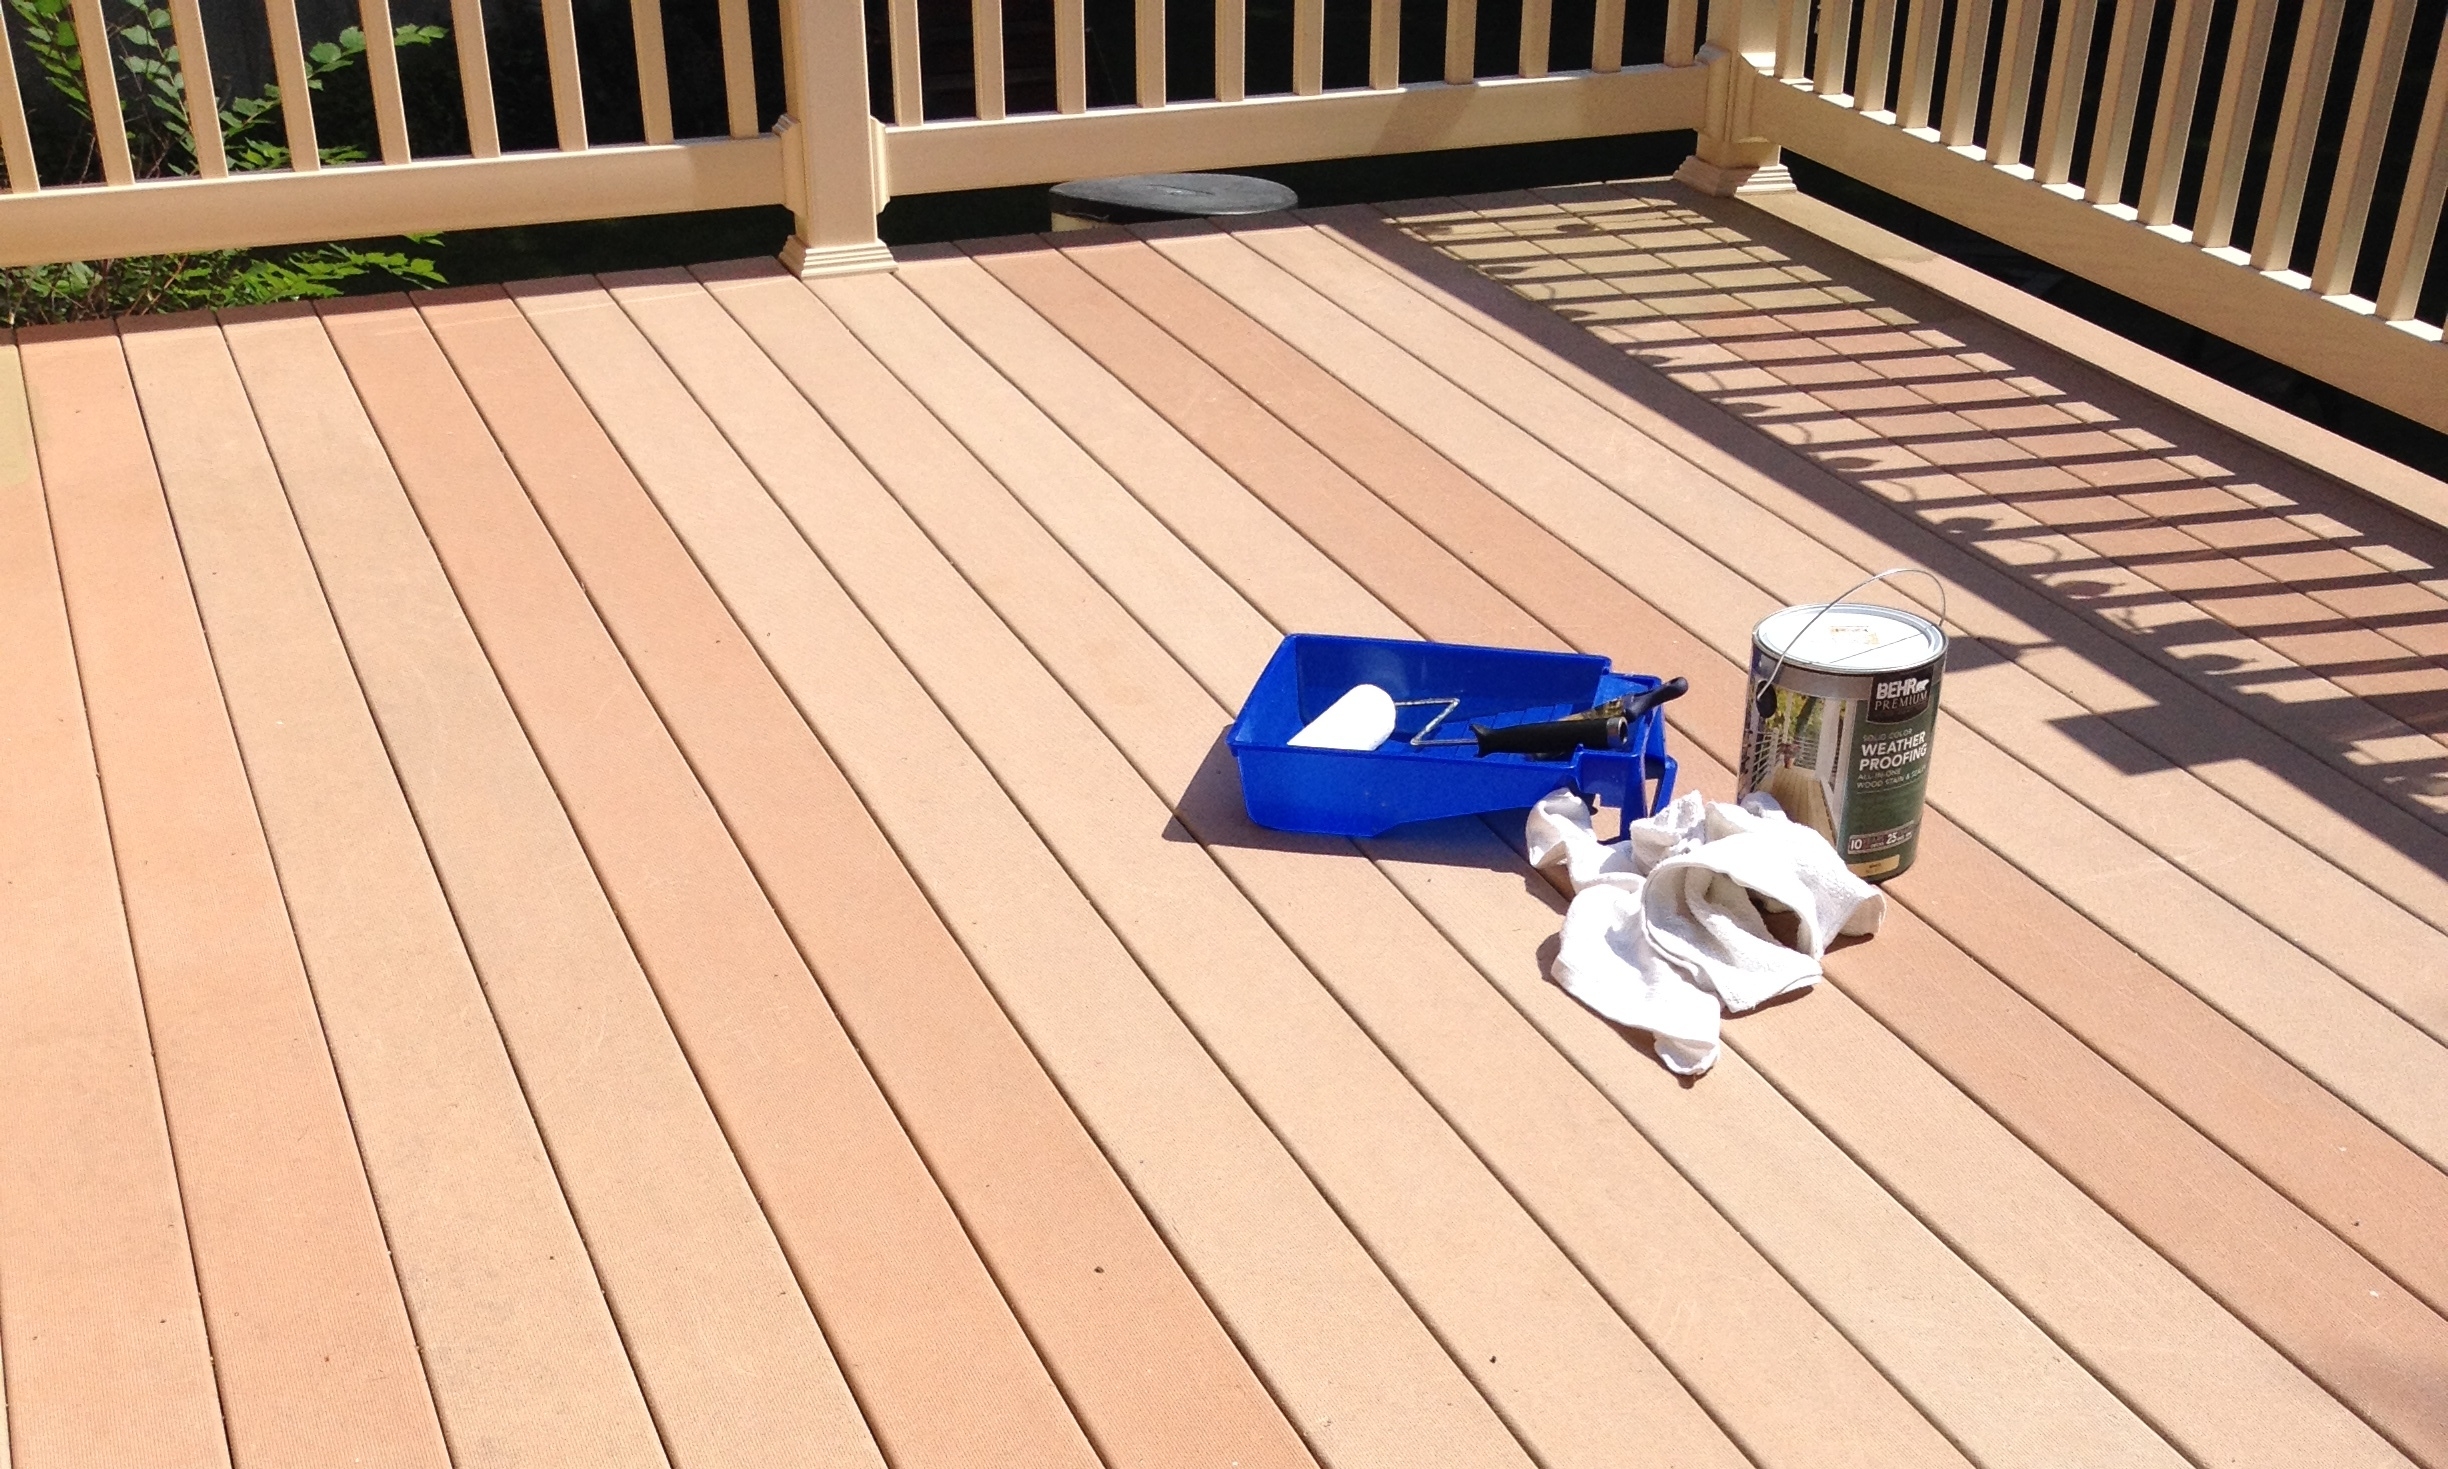
After
Pressure-washed and painted.... now clean, uniform, and neutral-colored.


The paint color is “TRX-10: Sahara”, but I can’t seem to find that exact color on Behr’s website. Hopefully the paint numbers from the can are sufficient to replicate the color when the time comes to re-coat.

Fire Table
Custom painted tile now adorns my fire table.
I found a fire table that can be used as a sort of coffee table when it's not being used to burn stuff. The color isn't my favorite, so I'm spray painting the tiles.


Master Bedroom Paint
Giving the bedroom a soothing vibe with a neutral khaki color.
Eddie Bauer "Wicker" (EB11-2)


Front Door
My forest dwelling is better suited to forest green.
Before
Old color, old handle
After
New color, new handle
Since the door is already covered with dents and brush drips, I didn't feel bad about going at it with the rattle can. Someday I'll get both steel doors replaced, but for now, this is perfect.